作者: http://grimgringaming.com/
程式語言: C#
影片教學: https://www.youtube.com/playlist?list=PLVcLoRPDv_dpsCYA_v-3h-tdBElmpx24V
原檔案: http://grimgringaming.com/downloads/
Camera Panning – Scenery
Camera Panning Fulling Package
影片簡說
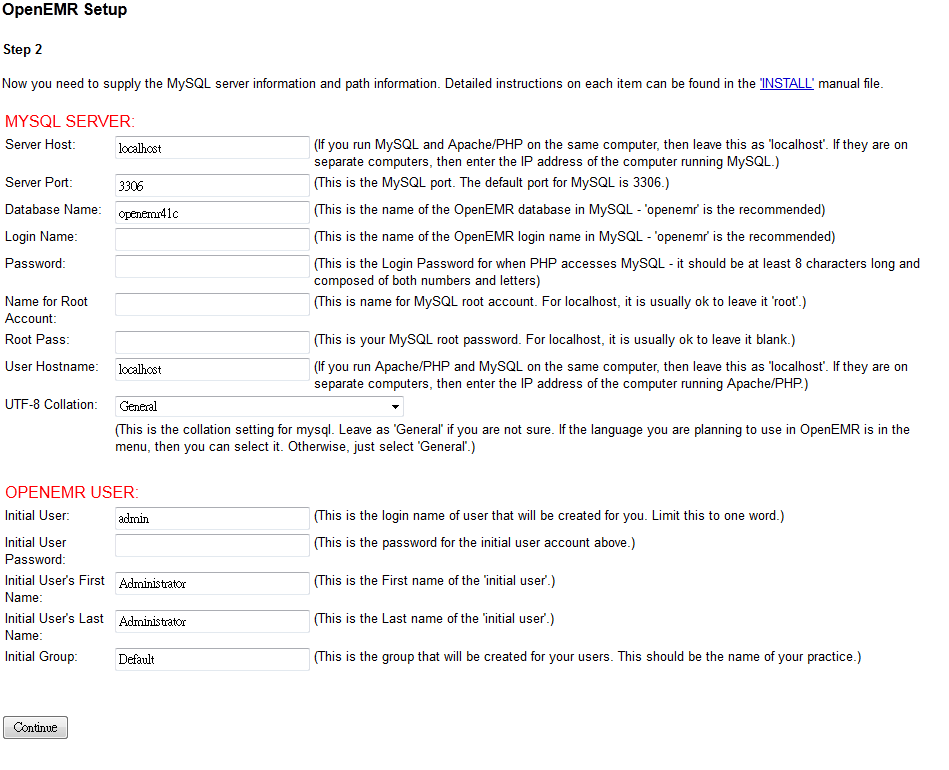
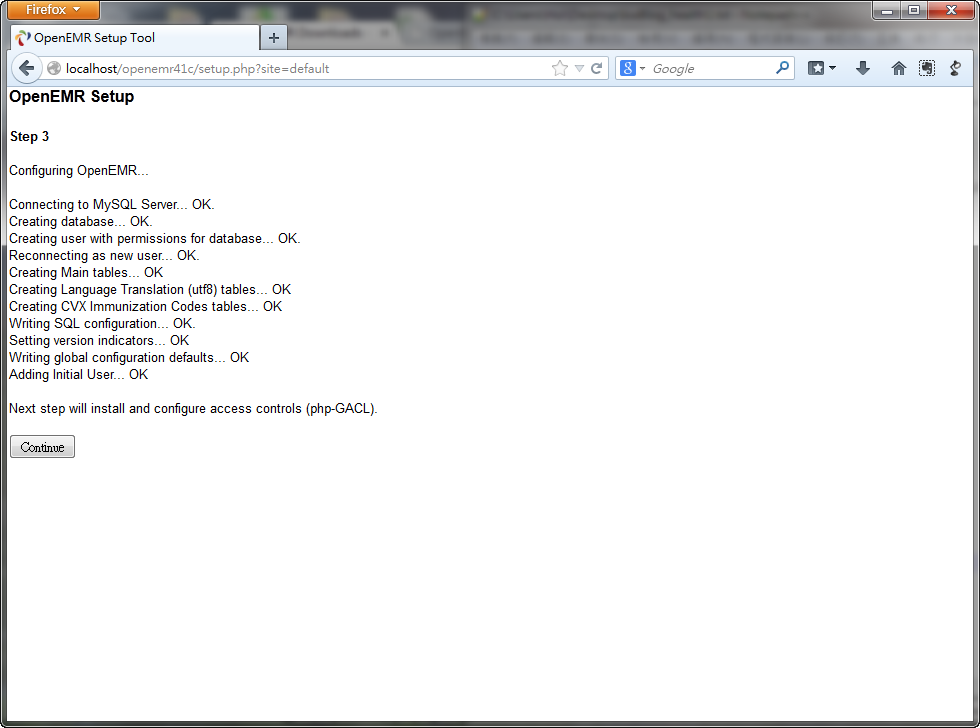
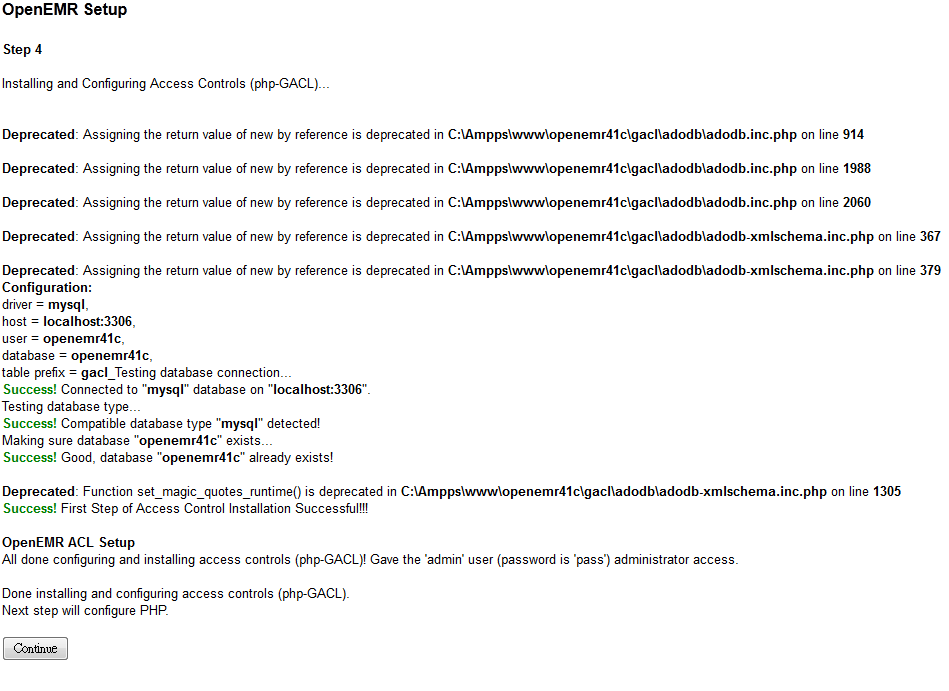
1. 基本設定和運用
2. 主鏡頭在背景圖大小範圍內移動
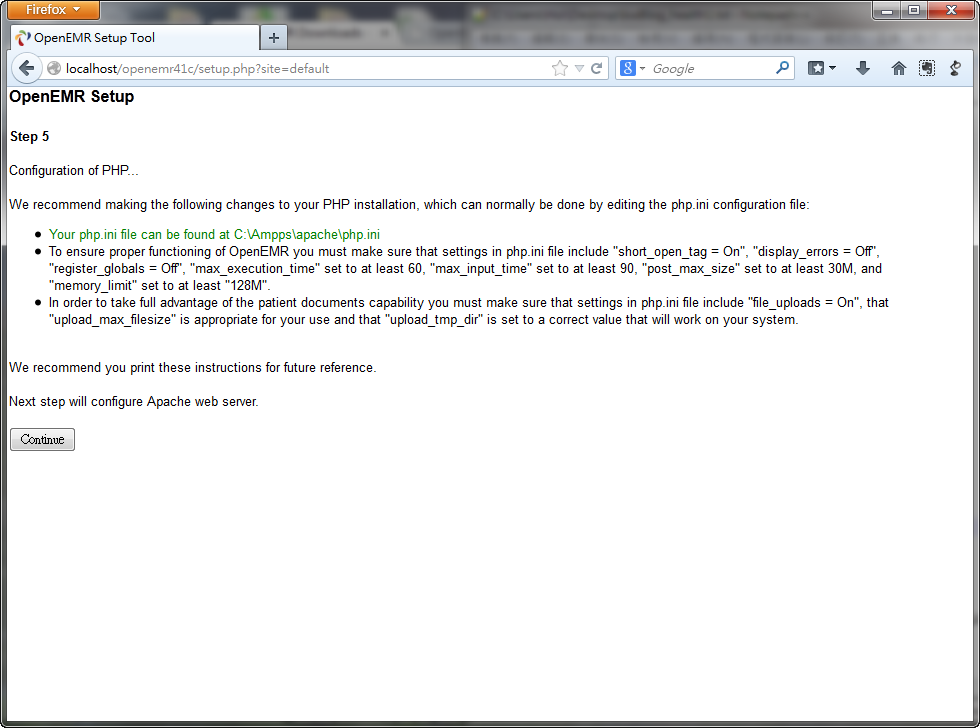
3. 優化